World Machine Tip of the Month : Tuesday, April 29th, 2003.#5: An Introduction to Macros |
So as we stated earlier, the devices that we put inside the macro, that vanished from our workview, actually reside now inside their own world, a "Macro world". Unlike the black box analogy we've been using up till now, we can enter that world and make changes.
Let's jump down the rabbit hole...
Select the macro we've made above (or any macro), and right click. From the menu that appears, choose "Edit Macro Components". As soon as you do so, your workview will change. On the left sidebar, you'll see the "Current World" indicator has changed from "(Top-level)" to "Flattened World". This indicates what world you're currently inside of.
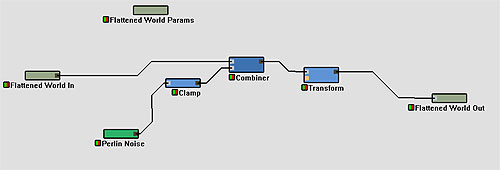
In the workview, we can see all of the devices that we previously made and sent to this world, hooked up to a wierd collection of grey boxes. All macros have 3 permanent (non-deletable) devices inside of them, marked by the name of the macro and "In", "Out", and "Params". They represent the tunnels that bridge between the macro world and the outside world.
First of all, notice that we can add, edit, and remove devices in here, just as we could anywhere else. For example, let's hook up an erosion filter just as we normally would, between the transform device and "Flattened World Out".
To leave the macro world, hit the button titled "Return to parent" on the left sidebar, or right click on any of the 3 grey component devices and choose "Return to Outside World" from the right click menu.
You can see that our macro is now performing erosion on the terrain, just as we would expect!
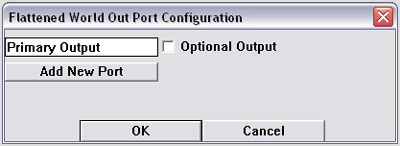
To add a new port, just click the "Add New Port" button. Presto! You can rename any of the existing ports, as well as flag them as Optional.
|
|
| I went ahead and made 3 new optional outputs to pass along the erosion information in. Click OK, and you will see the Out device now has additional inputs. Hook up the erosion outputs to them. When you're done, it will look like the following: | 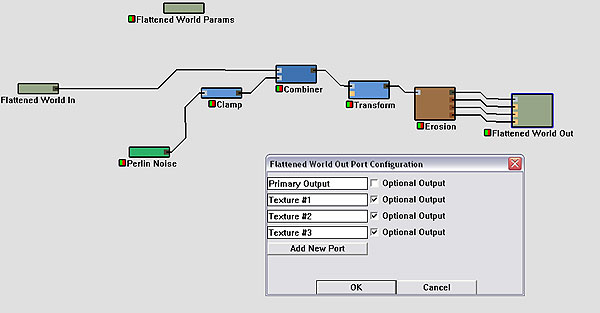 |
Returning to the outside world, we can see the macro device now has additional output ports, that we can then connect to a File Output device, or whatever else we desire!
Flagging an input as Optional can be very important. A macro will not build unless every input that is not marked optional is connected. So if the input isn't actually necessary for the network inside to build, make sure to mark it optional.
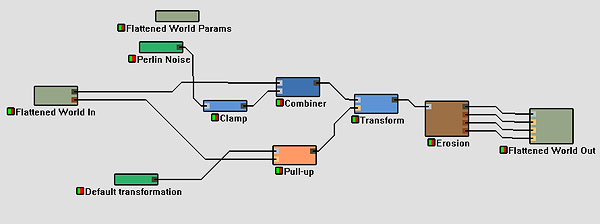
The pull-up is a strange device, found dwelling in the Heightfield Operators->Utilities submenu. It's only purpose in life is to assist optional inputs in their functioning. Here's how it works:
What possible good does this do us?
Imagine that in our macro, we want to allow the user to control the area that is affected by the transform device. However, if they do not specify anything, we want it to default to being a random perlin noise mask.
Here's how we would achieve that:
Still not satisfied? Need more power or control, or just plain want to make a really good macro? Follow along next week, as we add parameterization to the macro we've just created, and turn it into something quite interesting...